Do you own a new cooktop and do not know how to convert the LPG gas stove to PNG? Similarly, your PNG Gas Chula needs to be converted to LPG since you have shifted somewhere else and the gas pipeline is not there. The article explains why and how to convert gas stove from LPG to PNG and vice versa. Moreover, it explains how you can do it easily and without any support. Also, keeps your expense under control.
How to convert LPG gas stove to PNG
What is the actual problem? Why is the conversion required?
All cooktops are manufactured as per the LPG specifications. On the other hand, pipe gas lines (like PNG) are increasing their footprints. This is because of fact that PNG is cheaper and easy to access. Hence, these cooktops need to be changed as per PNG specifications. The major reason is the difference between the two gases explained in the next section.
The LPG gas stove once converted to PNG Gas Chula can not be reversed. Hence, again the conversion is required to enable it to work on the LPG connection again.
You can either use induction stoves or gas stoves for cooking. For gas stoves, we can further use LPG or PNG as per availability. Before we proceed with how to convert LPG gas stove to PNG and vice versa, let us first understand the basic difference between two combustible gases- LPG and PNG.
LPG stands for Liquified Petroleum Gas. This is a bottled gas made of propane or butane which is a petroleum by-product. Whereas, PNG stands for Piped Natural Gas. This is a natural gas made up of Methane.
LPG has a considerably high energy content, therefore less gas is required to produce the same quantity of heat.
Density-wise, LPG is heavier than PNG.
Appliances designed for LPG operate at high pressure (2.75kPa), whereas appliances designed to work on PNG operate at less pressure (1.1kPa).
Therefore, considering the properties above, it is necessary to design your cooktops accordingly. In case you operate an LPG gas stove on PNG, the flames over the burners will be too low or will not burn at all. The heat produced as a result of this will not be effective. Whereas, if the reverse is done there is a huge chance of fire since the pressure of LPG is higher. The gas cloud would rush in with pressure and hence combustion would result in a high flame which is dangerous.
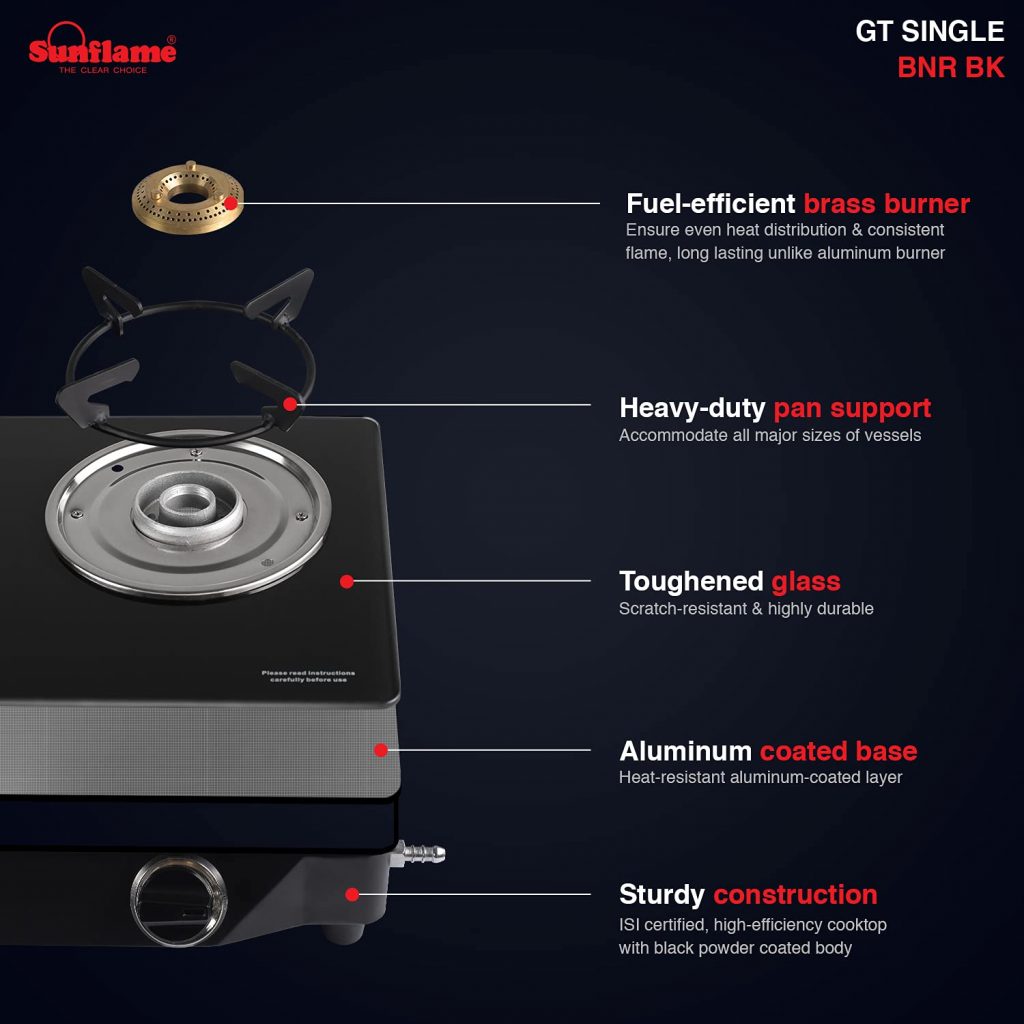
Knowing The Basic Structure Of Gas Stove Before Converting LPG Gas Stove To PNG Or Vice Versa.
Let us see what is beneath your cooktop.
Various components of Gas Chula
Understanding each component is important when we convert a gas stove from LPG to PNG or vice versa.
Bundy Pipes: Bundy pipes are the network of pipes inside your cooktop that helps in carrying the gas from one point to other. Nowadays these pipes are made up of aluminum. These pipes start from the gas inlet nozzle, go to the gas valve assembly, and ultimately from there travel and terminate at the mixing tube.
Mixing Tube: This is the assembly where we keep our burners. These come in different sizes and depend upon the size of the burner like a small, medium, big, commercial, etc. This is the place where the mixing of gas with air happens. It holds the Bundy pipe. Further, the end of the Bundy pipe within the mixing tube holds the gas jet. It is so designed that the mixing of oxygen (air) with gas (LPG or PNG) takes place in the mixing tube in the desired ratio to give you an excellent result. Each gas mixes in a different ratio. For example, the Air : Gas ratio of LPG is 25:1 whereas for PNG is 10:1.
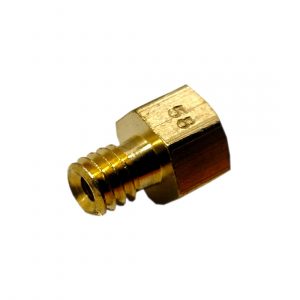
Jet: Sometimes referred to as Gas Stove Nipple. The gas jet is a small structure with a tunnel type that allows the desired set amount of gas to gush through it. The jets are made up of Brass. These come in different sizes. These can be classified in two ways. First, on the type of Gas used (LPG or PNG) or the size of burner used. Different sizes of jets are allocated different numbers.
58 – Usually used with small burners
65- Usually used with small and medium burners
71/ 77- Usually used with big burners
85- Used with super big burners
110- Used with a commercial burner
Gas Stove Jet/ Nipple
4. Gas Valve Assembly: This assembly is also made of brass. It controls the amount of gas that needs to be passed to the mixing tube. This actually controls the sim of the cooktop. These are constructed as per gas type but come in standard sizes. It has a human interface that can be controlled through knobs on one side.
Gas Valve Assembly
Step By Step on How To Convert LPG Gas Stove To PNG
Steps to convert LPG gas stove to PNG by yourself (FIY)
Remove all the loose parts such as pan supports, burners, and O-rings from the top of a gas stove.
Turn the gas stove upside down. Do it carefully on the plain surface and take care of glass in the case of glass cooktops.
Unscrew and loosen the Bundy pipe from the mixing tube. Do it for all the burners.
With a small pressure take out the Bundy pipe from the mixing tube. This needs to be done on all the burners. Do it with soft hands to avoid deforming of Bundy pipe
You will notice a jet on the tip of each Bundy pipe. Note down the numbers on each jet and the corresponding position. Later, you need to replace it with the same numbers.
Open all the jets with a spanner. (Appropriate spanners are provided along with the conversion kit )
Replace these jets with the right gas-type jets provided in the conversion kit. If the gas stove is required to be changed to PNG replace it with PNG jets and vice versa. This is the first part that needs to be changed in the conversion process.
Refix all the Bundy pipes back into mixing tubes. Screw it back.
Now we will replace the gas valve which is the second and the last part to be replaced while converting the gas stove from LPG to PNG or vice versa.
Observe the gas valve from the top inside. With one hand rotate the knob of the cooktop to its top position, till you observe a small screw on the gas valve. Leave the knob once the screw is accessible. Open this screw with a thin screwdriver provided with the conversion kit.
Once the screw is out, pull out the knob from the front end of the cooktop. Along with the knob comes out the knob holder and a spring. Now pull out the brass structure beneath it. It is the actual cock that needs to be changed for conversion. Replace them from the conversion kit. these are all the same.
After inserting the converted piece back into the block, rotate it slightly as you have done initially with the knob in point 10. Once you have matched the hole of the gas valve, re-insert the spring and holder. Screw them back and refit the knob.
Repeat this process for all the burners. Turn the gas stove upside down again. Now it is ready to use on the converted line.
Did you notice how simple is this? You just have to order a conversion kit from Direct Spares and get set to go. Within 20 minutes and without any support you can get this done easily.
Conclusion on how to convert LPG gas stove to PNG
The PNG pipeline technicians get the gas stove converted on a chargeable basis. They usually charge Rs. 100 to 150 per burner. Do you really know what they do? They increase the size of your spare holes with a rimmer. Now it is your good luck that the holes are drilled with precision and are not accidentally wider than required. This experiment will lead to your new cooktop becoming inefficient. Wider holes will result in the blackening of utensils or higher flames than required. Less wide will result in no or low flame.
Replacing the new kits is a better option than experimenting with your cooktop. These spares are prepared with precision and tested. Moreover, these come with support and a warranty.
The following article shall help you in understanding that how to fix air fryer for the common as well as a technical problem that you may experience while using it. Besides, the article takes you to the Frequently Asked Questions section wherein we have tried to answer some of the questions that people have in their minds before and while using the product. I recommend that you read about how does an Air Fryer work before you get on to this article to have a better understanding.
I will also discuss Appliances Assistance Program, wherein we will be interacting with you for any kind of problem you are facing in any of your appliances. As you know, Air Fryers are one of the trending products of this decade, so we will assist you in all possible ways to use it to its full capacity.
Precautions and Instructions to be followed
Before you buy
Always use the recommended power source for your appliance. Basically, check for the Voltage and frequency at your power source before you choose your Air Fryer.
Next, decide the surface for the placement of the Air Fryer. Air fryers should be kept on the flat, horizontal, non-conductive, and heat-resistant surface.
Similarly, decide the space for placement. It should not be placed near to oven or any other heating appliances and should be placed at a convenient distance from the PowerPoint. Every Air Fryer has exhaust vents in it. Most of the time they are present on the backside of the appliance. Through these vents, the hot air passes out. Hence, the air fryer should not be placed stuck to the wall. There should be a distance of approx 7 inches from the wall.
Unboxing and the First use
Take out your new air fryer from the box. Check for any physical damages all around the set. Customers have basically found two major issues during transit and that need to be checked. First, the basket or switch that senses the basket gets somewhat displaced. Ensure that the basket slides in smoothly and gets locked in the main unit. Secondly, there is a push button in the handle to take out Pan from the basket. In this sometimes, the spring that operates the push button gets displaced. So just check, that the button comes back to its home position once released after pressing.
Take out all the stickers, labels, tapes, and packing material before first use. Henceforth, check for any loose articles like packing material or paper pieces within the basket. If not taken out it may fly during cooking and stuck to element.
In fact, most manufacturers recommend preheating before you actually start using air fryers. This eliminates any odor that may be present within the chamber besides giving the nominal temperature for food to start.
Maintenence and Cleaning
Allow the Air Fryer to cool for 30 mins before you take out parts and start cleaning.
Do not use abrasive cleaning material for cleaning the mesh or pan since they are Teflon non-stick coated.
You may use warm water to clean inside the unit.
Use a cleaning brush to clean the element and to remove the food residues from it.
Wipe with moist cloth the outer and inner parts of the Air Fryer.
Accordingly, save these instructions and let us see how to fix air fryer at home for some common problems.
The food that is cooked has a large concentration of fats. Likewise, the oil sprinkled or coated over the food is more than required. As a result of which, it so happens that oil spills down in the pan and as a result, during the course of cooking due to excessive heat, the fat produces a lot of white smoke.
Solution: Though this white smoke does not affect the air fryer or cooking, however, it is desirable to pause the cooking and pour out the excessive oil in the pan carefully.
The pan may contain residue from the earlier cooking This residual oil produces white smoke on heating
Solution: Similar to the step above, pour out the residual oil and wipe the pan with a dry cloth. Henceforth continue with your cooking.
The white flour or bread coating is not properly fixed with food as a result these cook separately from the main food and may produce some smoke
Solution: Ensure all the coatings properly adhere to the food. Moreover, please ensure that there should not be over-dripping of these coatings.
Solution: Run some other appliance on the same power source. If it does not work, change the power source.
The food basket is not properly inserted.
Solution: Look out for some obstructions, remove and try re-inserting the basket again. Similarly, check if the food basket is overloaded, remove the excess food and re-insert. Unless the basket is intact, most of the Air Fryers will not start as a safety feature.
The timer is not set.
Solution: The analog models of Air Fryers will not function unless the timer is set to the desired point. Once the timer is adjusted more than 5 minutes, Air Fryer will automatically start functioning.
Solution: Never fill the pan beyond the MAX limit.
The basket switch is displaced in the main body slot.
Solution: The Best way is to analyze your basket for a small projection and align it with the point in the main body. If possible align the switch to the home position with the help of the aligner.
The pan is not properly fitted in the basket.
Solution: This can be because of two reasons. Either, the pan is not properly locked or the spring of the push button is displaced. In the second scenario, you can take out the push button with help of an aligner and adjust the spring. However, if you find this difficult, you may call for service.
The use of inferior quality or not suitable food article
Solution: Always choose fresh and good food ingredients for cooking. For instance, in order to make crispy fries, use fresh-picked, and hard Russet potatoes for frying. Use, French Fries cutter to cut them equally and in the ideal size.
Oil is not used at all.
Solution: Use small quantities of oil as per recipe. You can either brush or sprinkle oil drops as per requirement. For instance, potatoes slices fried without oil will shrink and become over brown however not crispy. A very small quantity of oil will enhance the frying and give them a crunchy taste.
The food is over crowded in the pan .
Solution: It is desirable to put smaller batches of ingredients in the pan. Since Air fryers work on the principle of convection so overcrowding of the food within the pan will not allow air to move and hence fry properly.
Right credentials are not set for the food .
Solution: The temperature and timer should be set as per the need of the recipe. The wrong settings will result in overcook or under-cook food and will not give you the desired results. However, this is an art that you will master over a period of time with your experience. Consequently, you will easily get to know how to fix air fryer for food quality.
In case of Dehydration, the procedure is not correct .
Solution: Most Airfryers these days come with dehydration function. Dehydration is a slow process and requires patience. Also, the food under preparation requires special steps before you put it for dehydration. Since this is a very vast subject you may refer Dehydrated food benefits and process to prepare it, for more details
Solution: Always take a pause and shake the food items in between the cooking. However, the ones that can not be shaken, should reverse the surfaces that are exposed to the heat. in between. This will enable equal distribution of heat all through.
If it is in initial days, it may be because of plastic parts.
Solution: You must have experienced a pungent smell of plastic from your new air fryers. Run few cycles with an empty basket. However in case the odor still exists, here is a small tip on how to fix air fryers for bad odor. To deodorize Air fryers mix 1 tablespoon of white vinegar and 1 tablespoon of lemon in an oven-safe bowl and place it on the food pan of the Air Fryer. Run the Air Fryer at 350 degrees for 3 minutes and subsequently allow it to cool for the next 15 mins. Wipe all the parts with a wet cloth and clean all the plastic surfaces. This will eliminate the odor.
During cooking the odor may be because of cooking oil.
Solution: Although air fryers use very little oil, using rancid cooking oil may give a very displeasing odor when air fryer runs. This is because the odor mixes with hot air convection and spread within and outside air fryers with exhaust.
Left over oil and food particles not cleaned properly before next use.
Solution: Just like any other appliances, Air fryers are also required to be cleaned before next use. This oil and articles, besides smoke, may give a bad odor. Clean the plastic parts with cold water. Make a solution of hot water with a tablespoon of baking soda. soak a cloth in it and with the damp cloth, wipe all the areas within and outside the air fryers. Subsequently, clean all parts with a dry cloth.
In the previous section, we have read, how to fix Air Fryer for some common problems at home. Besides these common problems, consumers have faced some more issues while operating. Here are a few of them. Furthermore, If you also have something to share or facing any problems with your air fryer, just write to us in the comments section, we will try to provide you with relevant solution. Hence it is important to read the comments section as well to get latest about the trends.
FAQ 1: Why does my Air Fryer smoke so much when I make Bacon??
Bacon has almost 50% monosaturated fat which is mostly composed of Oleic Acid (olive oil is made out of this and is considered ‘heart friendly‘). 40% of saturated fat and a decent amount of cholesterol. So Bacon contains lots of fat. So it produces excessive white smoke while cooking. Though this white smoke does not affect the air fryer or cooking, however, it is desirable to pause the cooking and pour out the excessive oil in the pan carefully.
FAQ 2: I used air fryer for the first time yesterday and it made a loud rattling noise the entire time it was on. Is this normal ?
No, this not normal. Indeed, in fact, it should not rattle at all. In my view, it is because of some hindrance in fan movement. This could have happened during delivery. If you have good technical aptitude and can identify the problem, refer to the next section on how to open-air fryer and check for possible problems technically.
FAQ 3: What is the non-stick coating material made out of?
This is a brand specific question. But, I may tell you that these days most reputed brands are going for imitation Ceramic since these are PTFE and BPA free. This is a newer material in the world of Non-Stick cookware. So, check out with your respective brands.
FAQ 4: Can you cook two items at the same time say chicken and a veggie??
Yes, you can very well cook multiple items at the same time. Just note the different cooking times of each item. The meat cooking time is more than Brussels, Sprouts or Asparagus.
How to fix air fryer technically.
Disclaimer: Use the tips mentioned in this section only if you having a technical aptitude and orientation towards dismantling and re-arranging the spares of appliances. The author will not be responsible for any damage, whatsoever it may be, that might happen due to inappropriate handling of the appliance
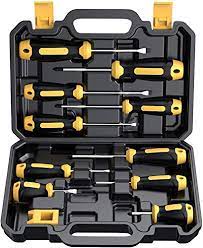
Recommended Tools
CREMAX Professional
Magnetic Screwdriver Set 10 PCS,
Cushion Grip 5 Phillips and 5 Flat Head Tips Screwdrivers
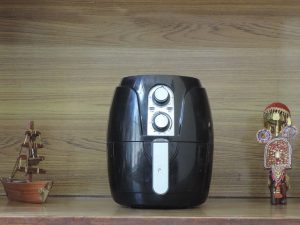
Technical dismantling and spares replacement is almost the same for all the Air fryer. However, for demo purposes, I am taking the help of the Inalsa Air Fryer model: CRISPY FRY
And if you are really serious about gifting this product. Checkout the our section for Home appliances as gifts
How to fix Air Fryer- Dismantling steps:
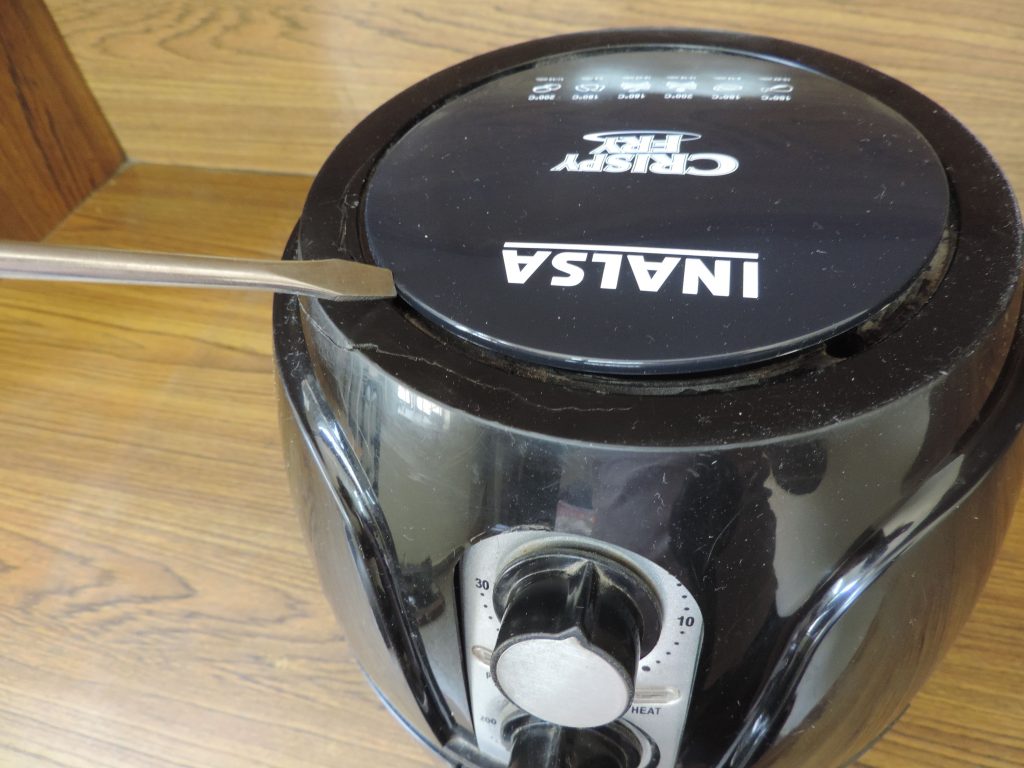
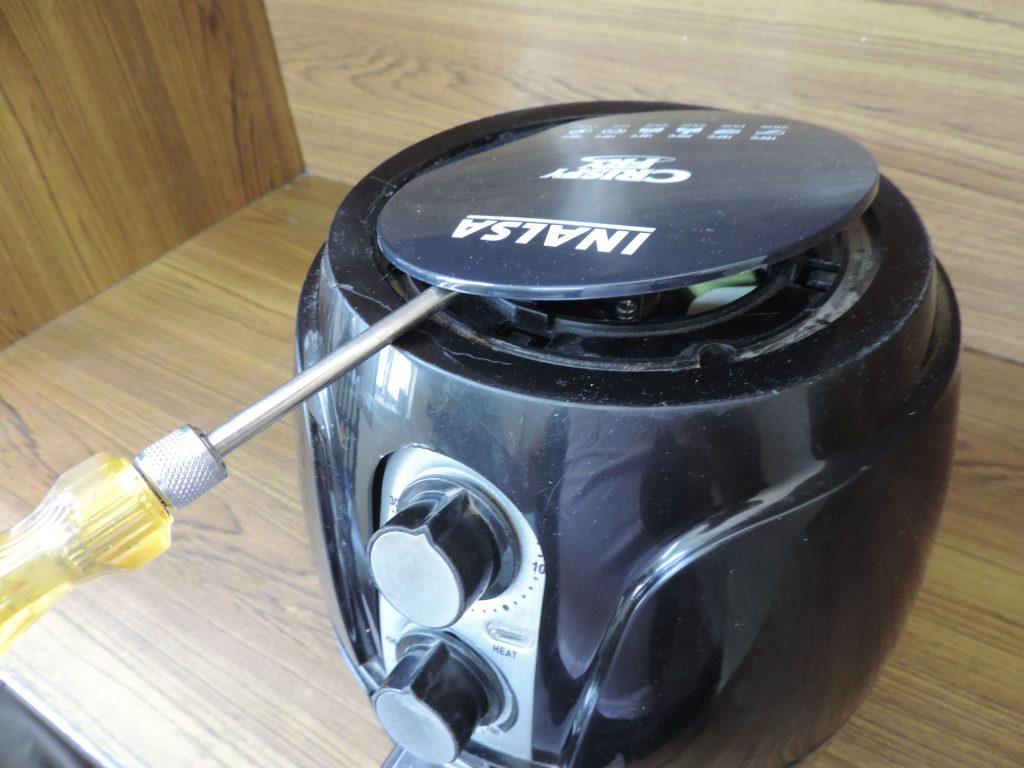
In fact, the engine of the compact form air fryers is placed at the top. Hence all these air fryers get unlatched from the top. They have a separate plate kind top cover. With the help of a flat screwdriver, just open the cover. This cover is basically press-fitted in the upper body
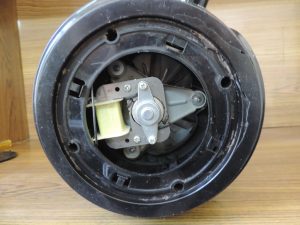
2. After removing the cover inner assembly looks like the one shown below. The center assembly is the Fan Assembly.
Top view inside air fryer
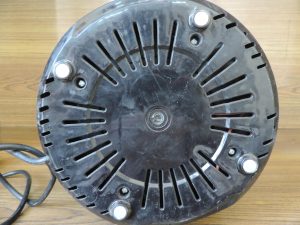
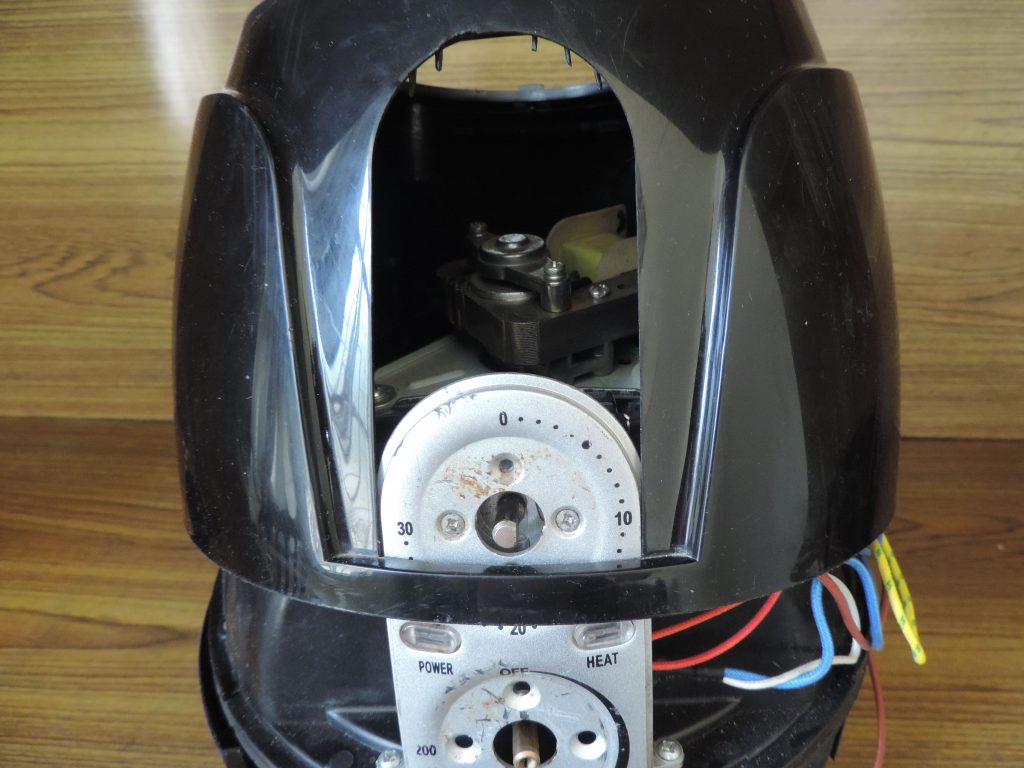
3. Next, we will open up the Air Fryer into two halves. For this, in the case of Crispy Fry, you need to open the four screws at the bottom.
Bottom of Air Fryer
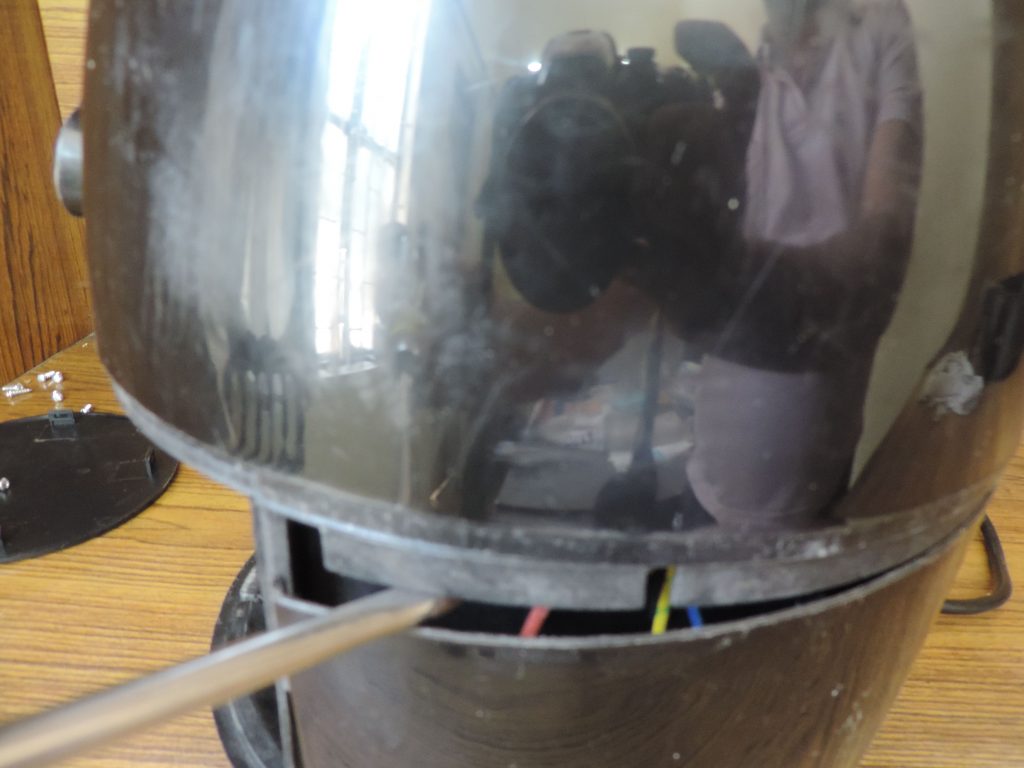
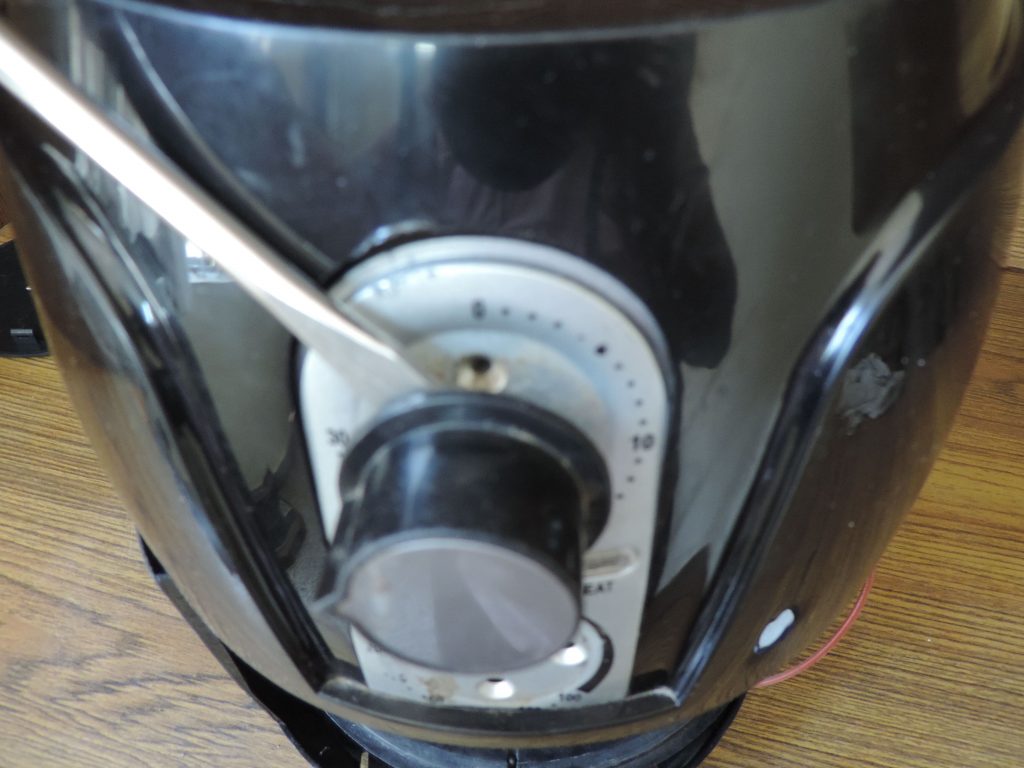
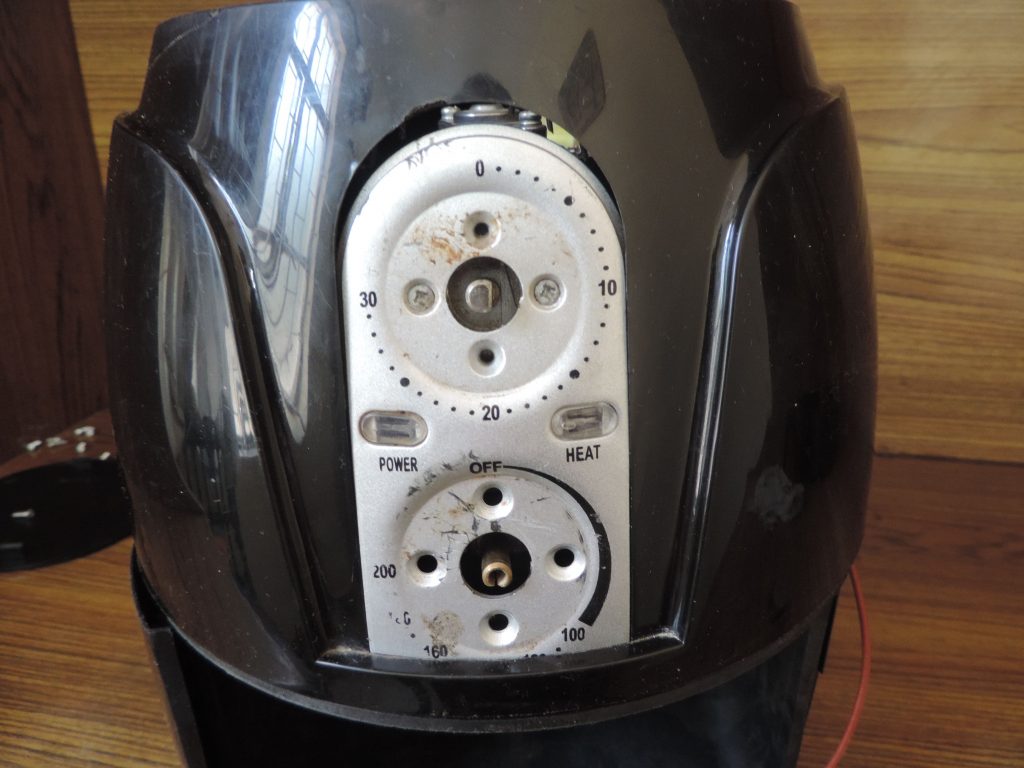
4. Disengage the upper body. Subsequently, in this process, you need to take out the knobs also. It can easily be done by pushing through a flat screwdriver. Models with digital displays can be done easily but take care of the wire harness or ribbon cable below.
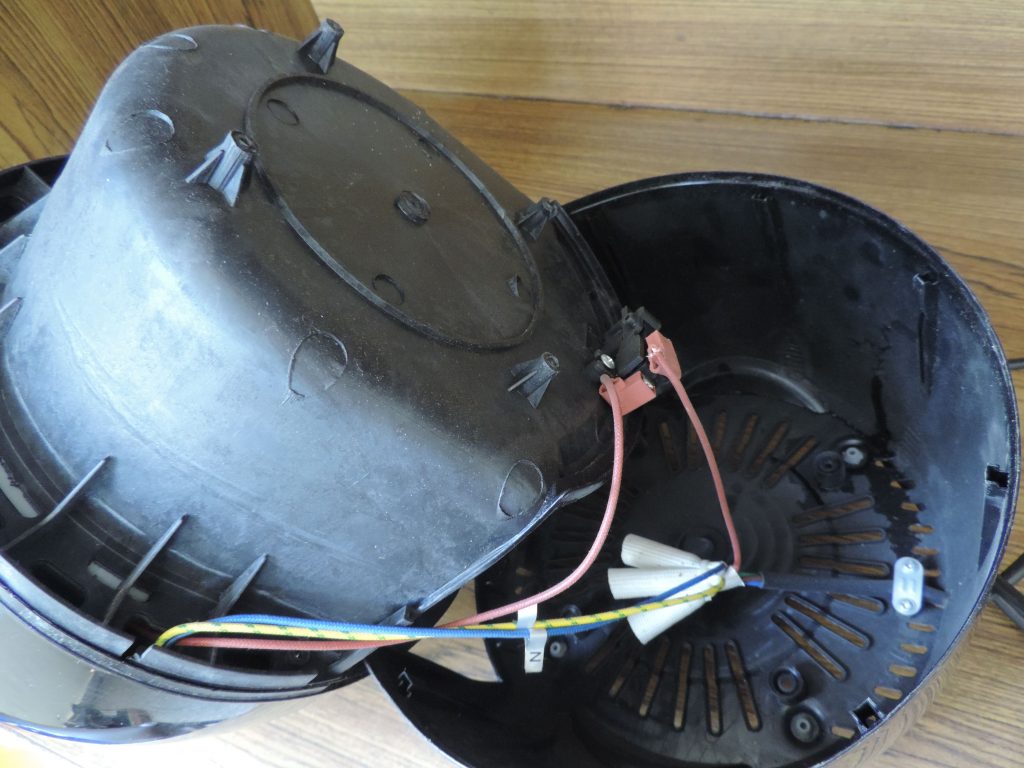
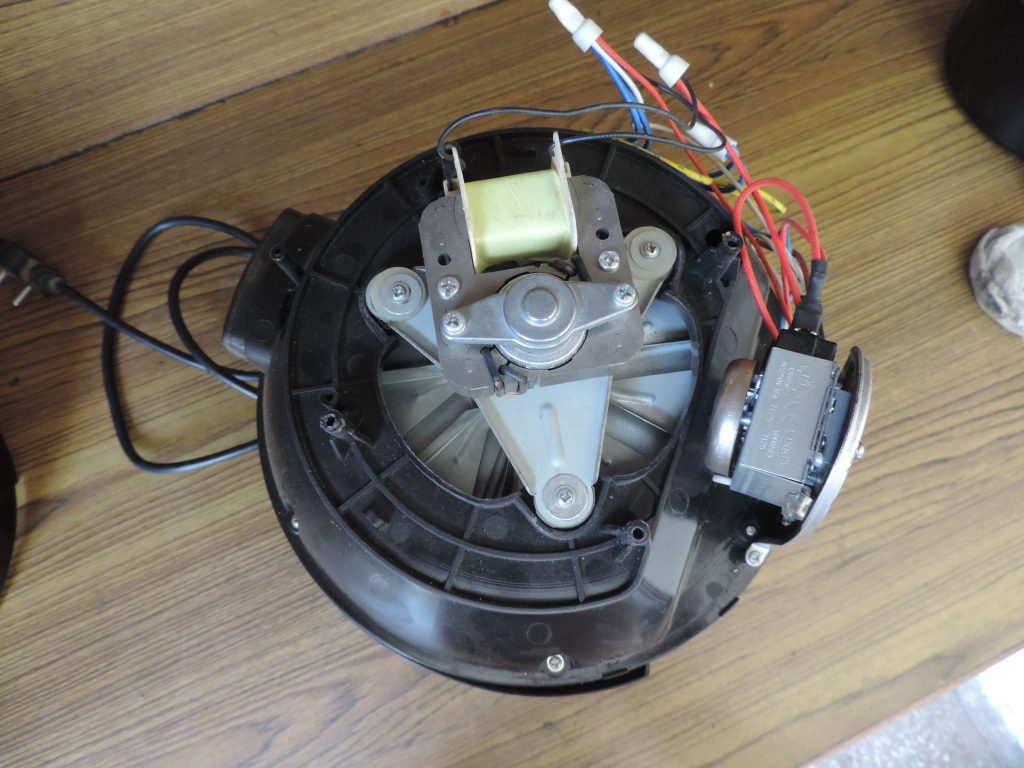
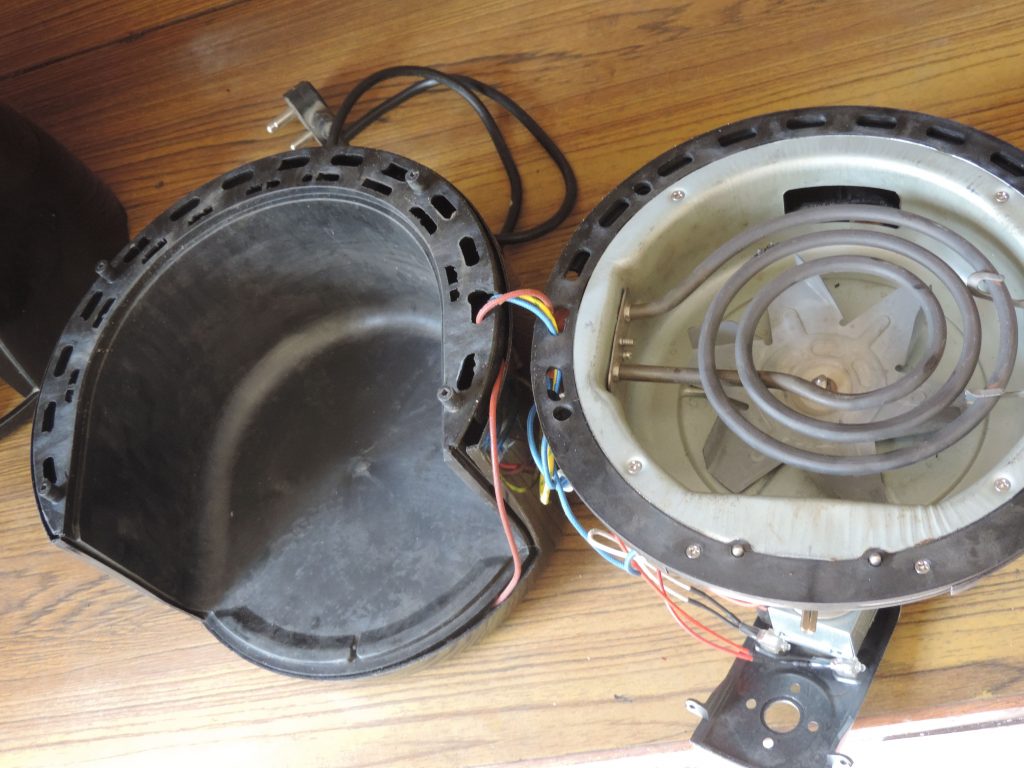
5. Now you have better access to Fan assembly and Element assembly which are the two main parts of the Air Fryer Engine. Both the parts are reliable.
Important components of Air Fryer Engine
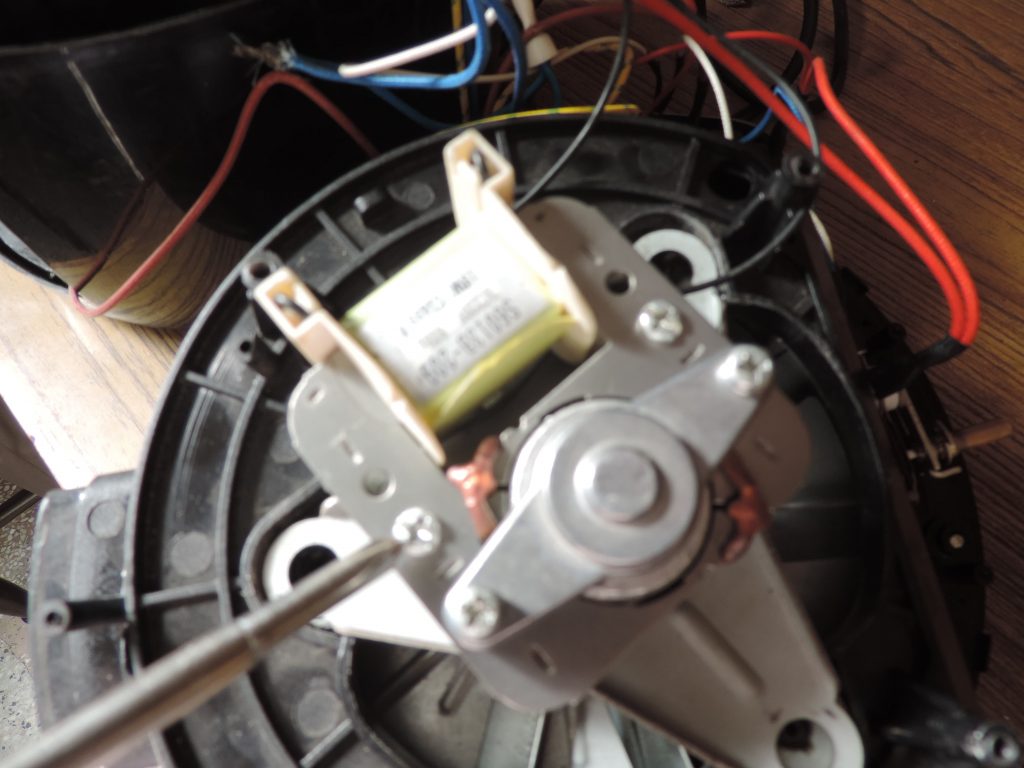
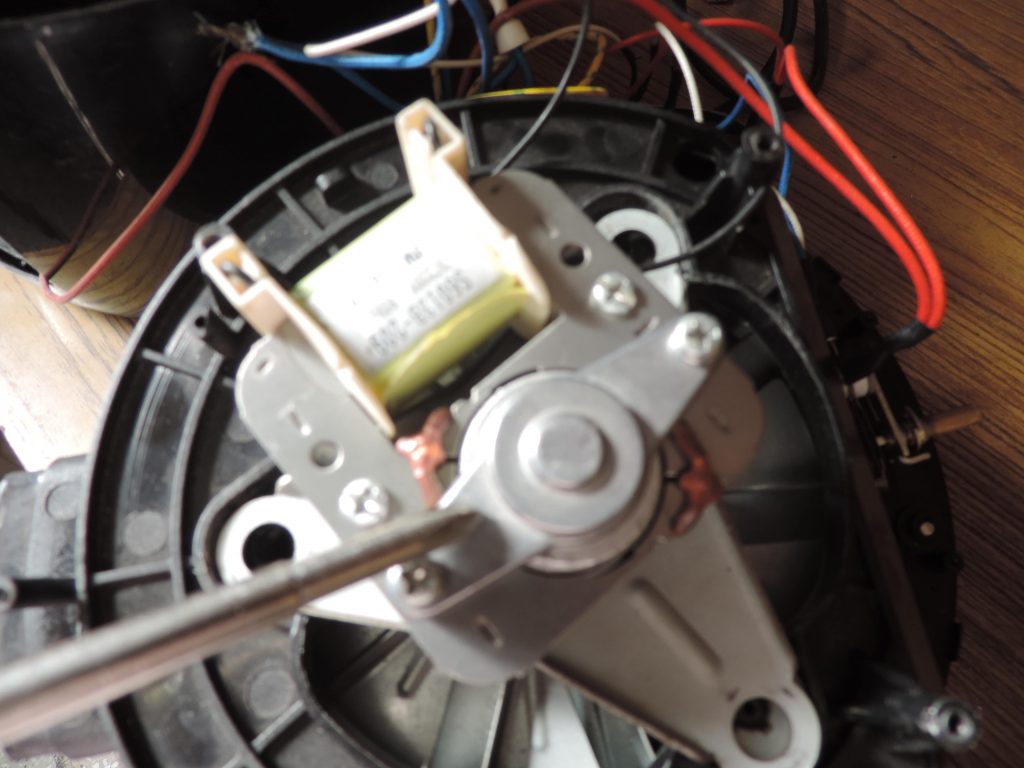
6. In case the fan is not working, you can get the fan motor replaced by just opening the screws and replace it with a new one.
Removing Fan motor and replacing with new one
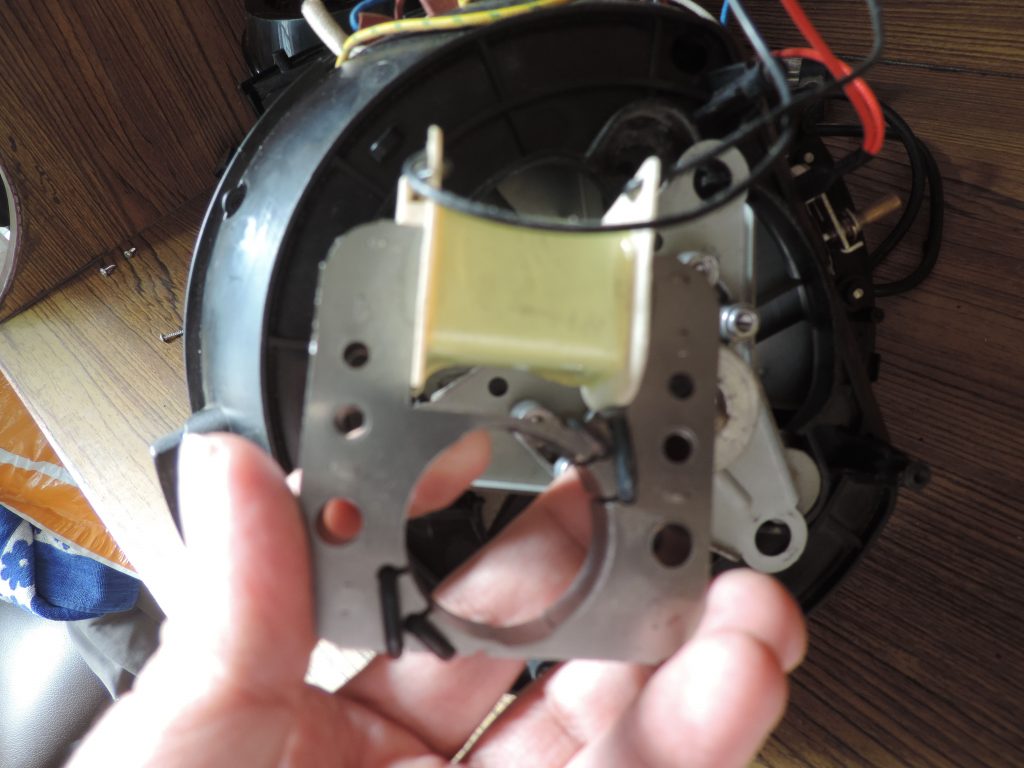
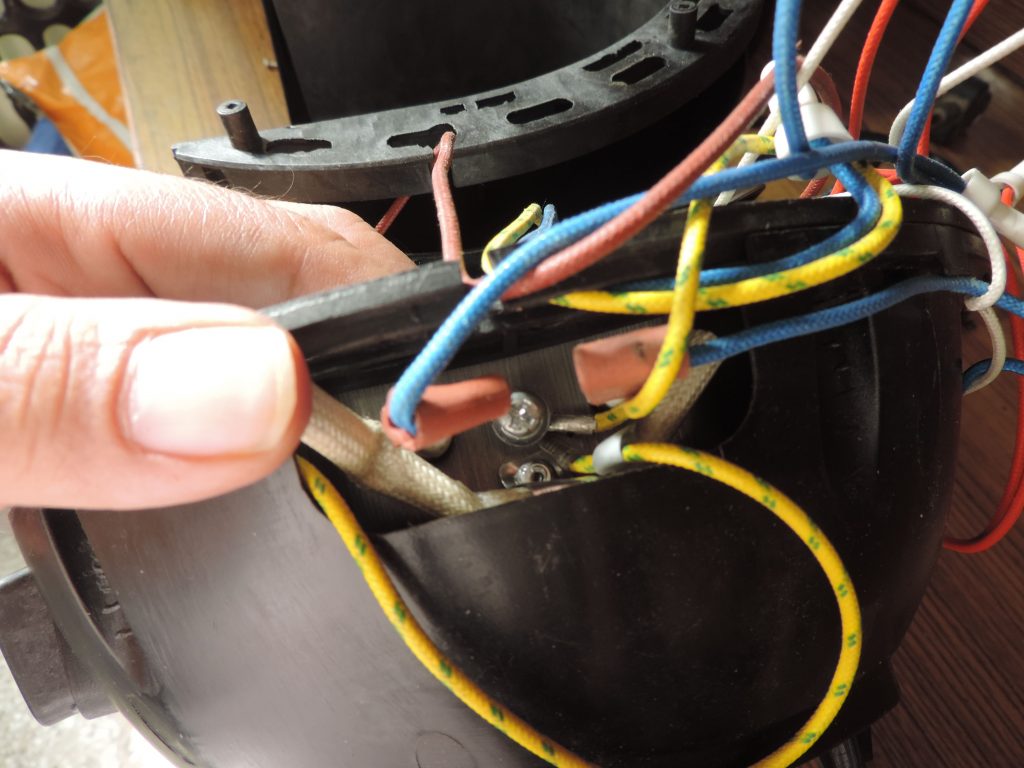
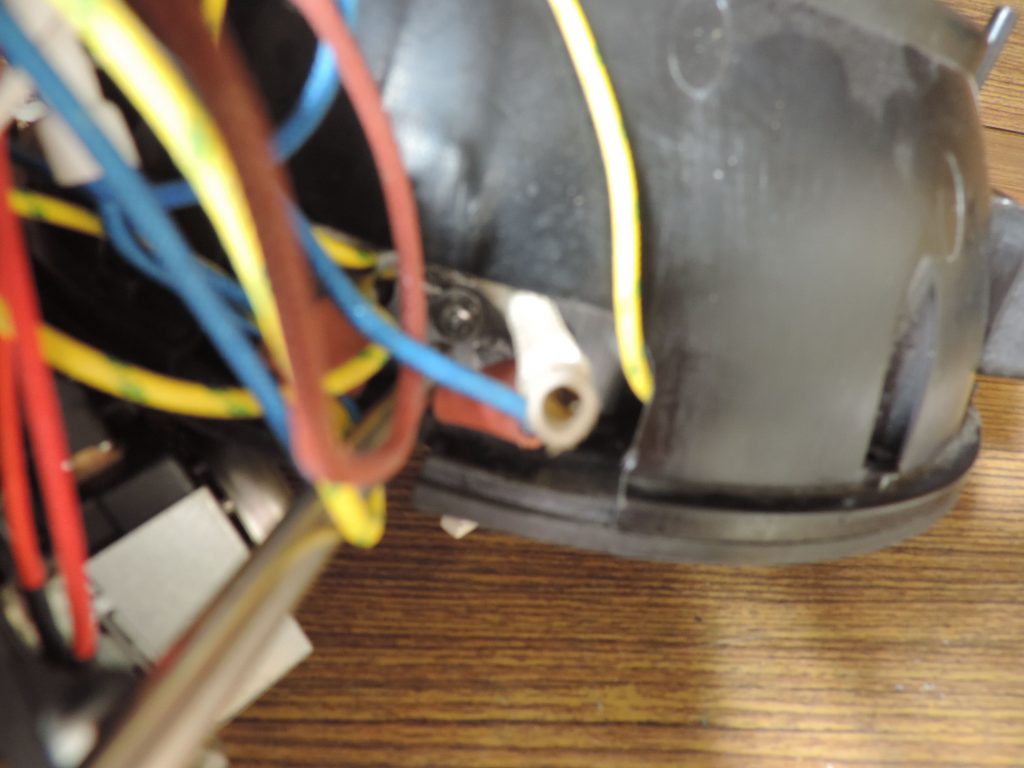
7. In order to remove the element, there are two screws on the outside of the body where the element is intact. open these screws and take out the element by taking it out from the hook. But before replacing the element check for the faulty thermostat or fuse. Fuse is there in white perforated colored cloth. The air fryer may work just by changing the fuse.
Dismantling the element
Trouble Shooting Prominent Technical Problems And Know How To Fix Air Fryer For These.
Since there are no logic board controls in analog models so these majorly have mechanical parts and less problems.
Fan sound is not coming although timer sound is coming. First, check the power supply with the help of a multimeter for desired voltage. Secondly, check for the fuse. A healthy fuse should give continuity of current (need to check this through the multimeter). Thirdly, check the health of the heating element. Check out the video on how to test heating elements with a Multimeter. Fourthly, check the thermostat knob assembly and lastly, you can suspect Fan motor and replace it. In a digital case, you can suspect the logic card for no display.
AstroAI 33D Digital Multimeter, DC AC Voltmeter, Ohm Volt Amp and Diode Voltage Tester Ohmmeter Continuity Detector with Backlight LCD Display
2. Fan sound is coming but the food is not getting heated. You can suspect a fuse, element, or thermostat knob set. In digital models, you can also suspect the logic card for malfunctioning.
3. Heating is not touching the desired temperature: In the same way, you can suspect the thermostat knob assembly for faulty cut out.
4 Display is not proper or indicator lights not working: In digital models, check for display cum logic card and replace with the new one.
Important Spares To Look Out for in Air Fryers:
Now, that you have a fair idea on how to fix air fryer, let us see important spares that you might required and their common terminology.
Fan Motor
Element Assembly
Fuse
Thermostat assembly
Timer Assembly
Wire Lead
Display cum Logic Card
Pan
Food Basket
Additional Accessories
Additional Accessories
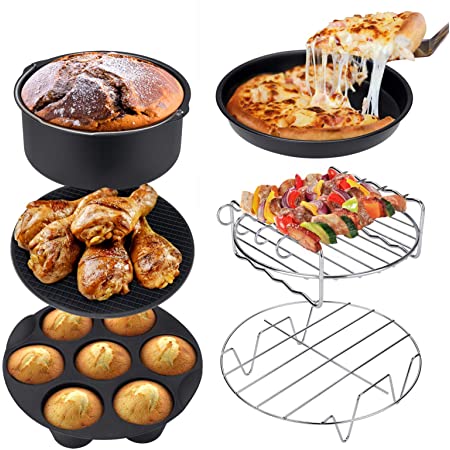
Just imagine the varieties of delicious food you can make with just the most needed accessories using your air fryer?
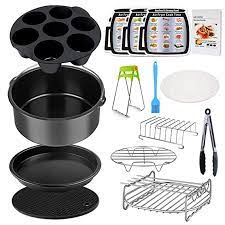
COSORI Accessories XL (C158-6AC) Set of 6 Fit all 5.8Qt, 6Qt Air Fryer, BPA Free, Dishwasher Safe, Nonstick Coating, Black
6 pcs accessory kit – Includes 1 x cake pan; 1 x pizza pan; 1 x metal holder; 1 x multi-purpose rack with 5 skewers; 1 x Silicone Mat; and 1 x egg bites mold with lid. Everything you need to cook without costing you more time and money to buy each piece individually.
Ultrean Air Fryer Accessories, Set of 6 Fit All 5.8Qt, 6Qt Air Fryers, BPA Free, Non-Stick, Dishwasher Safe, XL
Enjoy 6 essential air fryer accessories – 1 x cake barrel, 1 x silicon mat, 1 x pizza pan, 1 x multi-function grill with 4 skewers, 1 x egg bites mold, 1 x metal holder
YouTube On How To Fix Air Fryer (Available in Spanish and Hindi)
How to fix Air Fryer in Spanish
How to fix air fryer in Hindi
How do I get spares?
This is a million dollar question. Now that you are comfortable to replace the spares in your Air Fryer, but the question is where to get these spares from?
You can dial to your respective brand, but Brand will charge you the engineer visit cost to get the spare and fix it. Or you need to carry the product to their nearest service center.
Appliances Assistance Program
AT APPLIANCESLOVE.IN WE WILL ASSIST YOU OUT WITH THE PROBLEM AND WILL DELIVER THE SPARES REQUIRED BY YOU AT YOUR DOORSTEPS FOR ANY SMALL OR BIG APPLIANCE YOU HAVE.
Just write to us at care@applianceslove.in . We will assist you to dismantle your product, Diagnose it and Rectify it online. All assistance provided online will be free of cost
We cover following under Appliances Assistance Program:
1. Require online Demo or Repair assistance.
2. Require Spare parts or accessories for your appliance.
3. Decide on which brand and which appliance to purchase.
4. Want to buy second-hand branded appliances (certified True Value Product) with a warranty.
5. Want to sell your old appliance.
Lockdowns or Self Isolation has taken this worldwith Strom during this Corona Era. During this period Air Fryers are the most required kitchen appliance. And my team is there to support you.
Do write to us in the comments section below, in case you have any queries, suggestions, or any other appliance for which you require to fix at home.