Do you own a new cooktop and do not know how to convert the LPG gas stove to PNG? Similarly, your PNG Gas Chula needs to be converted to LPG since you have shifted somewhere else and the gas pipeline is not there. The article explains why and how to convert gas stove from LPG to PNG and vice versa. Moreover, it explains how you can do it easily and without any support. Also, keeps your expense under control.
What is the actual problem? Why is the conversion required?
All cooktops are manufactured as per the LPG specifications. On the other hand, pipe gas lines (like PNG) are increasing their footprints. This is because of fact that PNG is cheaper and easy to access. Hence, these cooktops need to be changed as per PNG specifications. The major reason is the difference between the two gases explained in the next section.
The LPG gas stove once converted to PNG Gas Chula can not be reversed. Hence, again the conversion is required to enable it to work on the LPG connection again.

Difference between LPG and PNG
You can either use induction stoves or gas stoves for cooking. For gas stoves, we can further use LPG or PNG as per availability. Before we proceed with how to convert LPG gas stove to PNG and vice versa, let us first understand the basic difference between two combustible gases- LPG and PNG.
- LPG stands for Liquified Petroleum Gas. This is a bottled gas made of propane or butane which is a petroleum by-product. Whereas, PNG stands for Piped Natural Gas. This is a natural gas made up of Methane.
- LPG has a considerably high energy content, therefore less gas is required to produce the same quantity of heat.
- Density-wise, LPG is heavier than PNG.
- Appliances designed for LPG operate at high pressure (2.75kPa), whereas appliances designed to work on PNG operate at less pressure (1.1kPa).
Therefore, considering the properties above, it is necessary to design your cooktops accordingly. In case you operate an LPG gas stove on PNG, the flames over the burners will be too low or will not burn at all. The heat produced as a result of this will not be effective. Whereas, if the reverse is done there is a huge chance of fire since the pressure of LPG is higher. The gas cloud would rush in with pressure and hence combustion would result in a high flame which is dangerous.
Knowing The Basic Structure Of Gas Stove Before Converting LPG Gas Stove To PNG Or Vice Versa.
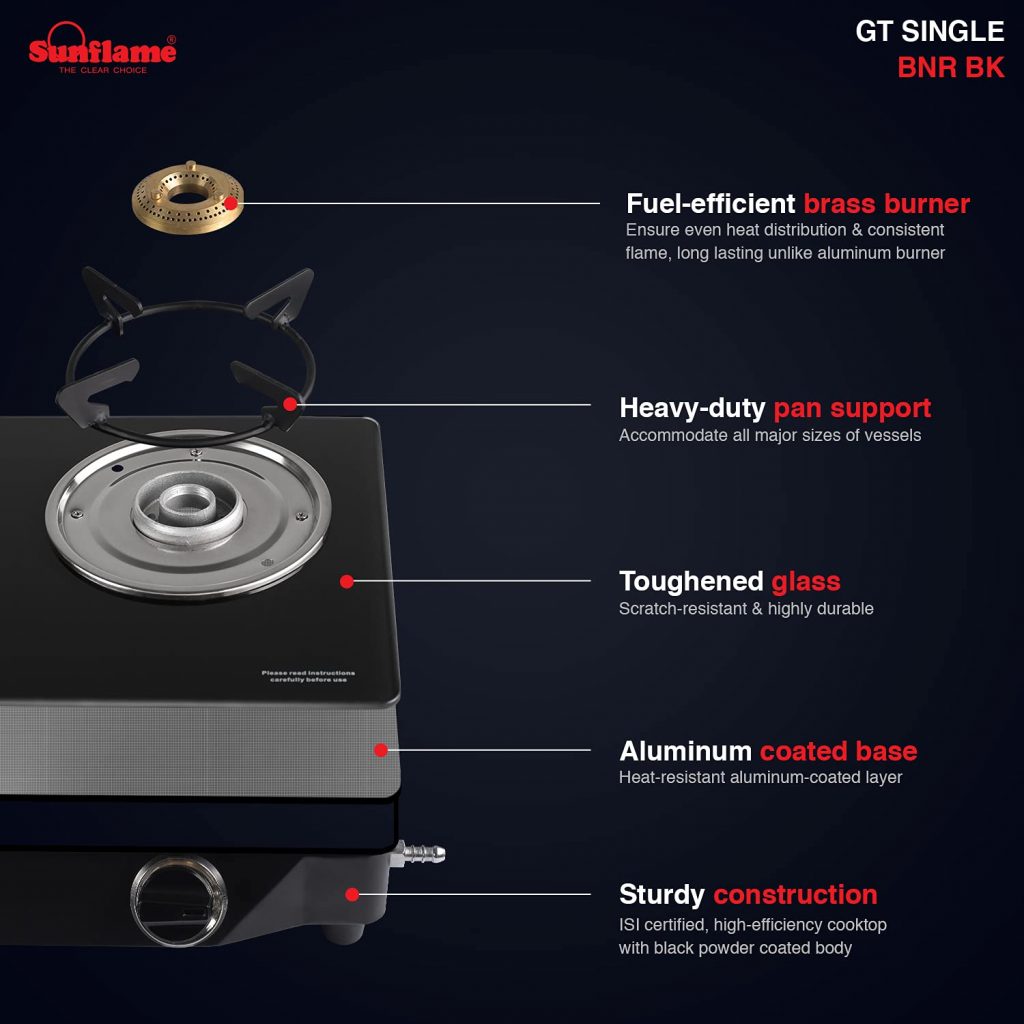
Let us see what is beneath your cooktop.

Understanding each component is important when we convert a gas stove from LPG to PNG or vice versa.
- Bundy Pipes: Bundy pipes are the network of pipes inside your cooktop that helps in carrying the gas from one point to other. Nowadays these pipes are made up of aluminum. These pipes start from the gas inlet nozzle, go to the gas valve assembly, and ultimately from there travel and terminate at the mixing tube.
- Mixing Tube: This is the assembly where we keep our burners. These come in different sizes and depend upon the size of the burner like a small, medium, big, commercial, etc. This is the place where the mixing of gas with air happens. It holds the Bundy pipe. Further, the end of the Bundy pipe within the mixing tube holds the gas jet. It is so designed that the mixing of oxygen (air) with gas (LPG or PNG) takes place in the mixing tube in the desired ratio to give you an excellent result. Each gas mixes in a different ratio. For example, the Air : Gas ratio of LPG is 25:1 whereas for PNG is 10:1.
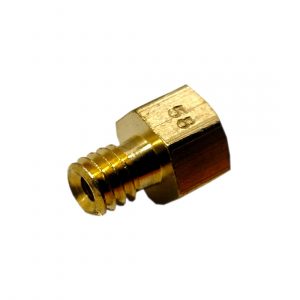
- Jet: Sometimes referred to as Gas Stove Nipple. The gas jet is a small structure with a tunnel type that allows the desired set amount of gas to gush through it. The jets are made up of Brass. These come in different sizes. These can be classified in two ways. First, on the type of Gas used (LPG or PNG) or the size of burner used. Different sizes of jets are allocated different numbers.
- 58 – Usually used with small burners
- 65- Usually used with small and medium burners
- 71/ 77- Usually used with big burners
- 85- Used with super big burners
- 110- Used with a commercial burner
4. Gas Valve Assembly: This assembly is also made of brass. It controls the amount of gas that needs to be passed to the mixing tube. This actually controls the sim of the cooktop. These are constructed as per gas type but come in standard sizes. It has a human interface that can be controlled through knobs on one side.

Step By Step on How To Convert LPG Gas Stove To PNG
| Things Required | Conversion Kit ordered from Direct Spares |
| Time Taken | An average of 20 mins for a 3- burner gas stove |
| Expertise level required | Mid-level |
| Supporting Videos | Available |
Steps to convert LPG gas stove to PNG by yourself (FIY)
- Remove all the loose parts such as pan supports, burners, and O-rings from the top of a gas stove.
- Turn the gas stove upside down. Do it carefully on the plain surface and take care of glass in the case of glass cooktops.
- Unscrew and loosen the Bundy pipe from the mixing tube. Do it for all the burners.
- With a small pressure take out the Bundy pipe from the mixing tube. This needs to be done on all the burners. Do it with soft hands to avoid deforming of Bundy pipe
- You will notice a jet on the tip of each Bundy pipe. Note down the numbers on each jet and the corresponding position. Later, you need to replace it with the same numbers.
- Open all the jets with a spanner. (Appropriate spanners are provided along with the conversion kit )
- Replace these jets with the right gas-type jets provided in the conversion kit. If the gas stove is required to be changed to PNG replace it with PNG jets and vice versa. This is the first part that needs to be changed in the conversion process.
- Refix all the Bundy pipes back into mixing tubes. Screw it back.
- Now we will replace the gas valve which is the second and the last part to be replaced while converting the gas stove from LPG to PNG or vice versa.
- Observe the gas valve from the top inside. With one hand rotate the knob of the cooktop to its top position, till you observe a small screw on the gas valve. Leave the knob once the screw is accessible. Open this screw with a thin screwdriver provided with the conversion kit.
- Once the screw is out, pull out the knob from the front end of the cooktop. Along with the knob comes out the knob holder and a spring. Now pull out the brass structure beneath it. It is the actual cock that needs to be changed for conversion. Replace them from the conversion kit. these are all the same.
- After inserting the converted piece back into the block, rotate it slightly as you have done initially with the knob in point 10. Once you have matched the hole of the gas valve, re-insert the spring and holder. Screw them back and refit the knob.
- Repeat this process for all the burners. Turn the gas stove upside down again. Now it is ready to use on the converted line.
Did you notice how simple is this? You just have to order a conversion kit from Direct Spares and get set to go. Within 20 minutes and without any support you can get this done easily.
Conclusion on how to convert LPG gas stove to PNG
The PNG pipeline technicians get the gas stove converted on a chargeable basis. They usually charge Rs. 100 to 150 per burner. Do you really know what they do? They increase the size of your spare holes with a rimmer. Now it is your good luck that the holes are drilled with precision and are not accidentally wider than required. This experiment will lead to your new cooktop becoming inefficient. Wider holes will result in the blackening of utensils or higher flames than required. Less wide will result in no or low flame.
Replacing the new kits is a better option than experimenting with your cooktop. These spares are prepared with precision and tested. Moreover, these come with support and a warranty.

